Day Five: Masking Email Addresses

Table of Contents
Task #2: Setting up an Email Mask
Congratulations, you have set up a new, super private email account! Maybe even more than one email account! And you have now spent time developing a list of all the different low, medium, high -- and highest -- security activities you need to do online. Hooray for options! Hooray for choice!
But recall that security levels were only one axis for managing your email accounts. What what about all these million and one different activities? Church choir, band practice, the kids' rollerblading lessons, the butcher's newsletters, holiday shopping faves. Does this require a million email accounts?
No: you are not going to need one million email accounts. You will use masking and aliases. Because fortunately an email account is not the same as an email address. Let me explain.
What are Masks and Aliases and Why do I need them?
All email accounts have an email address attached. But there are other ways of getting email sent to that account by addressing to a different address instead. If you've ever used automatic email forwarding, you've done this already: sent an email to one address only to have it forward to a different account's inbox.
On Gmail, you may even have used "subaddressing" by adding a "+" after your username, which is a nifty way to stay organized. It's still not a great system for obfuscation, though, because your email address "myname" is still visible right there in the address line!
Masks and Aliases keep your account's address unknown. These are alternative addresses that forward to your account behind the scenes. This is a great tool for thwarting detection in the personal data economy. With masking and aliases, you can give out many different addresses, while still receiving email to the same base account, making it more challenging to link those datasets together.
Masking and aliases are fairly identical in day-to-day practice, even if there are some slight differences behind the scenes. With an alias, you choose an email address -- like "groceries@myaccount.com" -- and it's assigned as a forward to your account. Some email systems like Fastmail and Thunderbird can also send emails as if they come from this alias. Aliases are like email addresses that don't have accounts tied directly to them: they forward to you instead.
Masking is a product offered by companies who come up with some strange combination of words or letters to "mask" your true email address. So you might get "gjkljahsg@mozmail.com" or "super-dog-days@duck.com". Where aliases are generally a little more stable, they can generate tons and tons of masks. These are best for incoming messages that you don't frequently have to respond to, although some companies (like DuckDuckGo) will let you send reply mail from your mask as if it were an alias.
This is a great tool for keeping your life organized. Tired of getting spam from a store you bought from thirteen years ago, but you don't want to click "unsubscribe" lest they learn your email address is active and sell it onward? Delete the mask and it won't reach you. Looking for every bill that came in from Verizon? Search for its email mask instead of through subject headers.
You can also easily track where an internet company snagged your email address from. If you only give out one mask per company, but a new company starts sending messages to that dedicated mask, you'll know exactly who gave you away.
Sign up!
Ensure you have one or more masking/alias service. These three are great and even include a browser plugin so you can generate masks and aliases at will:
- Protonmail comes with masking built in through their partner SimpleLogin, in France.
- Firefox Relay works with your Mozilla account to make aliases to forward to an account of your choice; they also have a phone number masking service too.
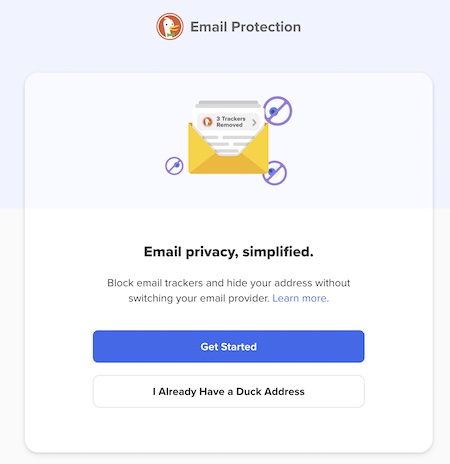
- DuckDuckGo offers "Email Protection" which gives you an @duck.com account, and automatically generated masks and aliases as well. When you get an email through DuckDuckGo's masking service, it removes all trackers, and allows you to respond with just the mask as your email address.
- Fastmail offers built-in aliases, even on the free basic version.
Once you've signed up for a service point it to your new general email address of choice (or, if you'd like, your super-spammy inbox). That way you will start getting those messages in that inbox.
Then add the relevant extension for Firefox (or whatever plugin for the browser you've chosen) to your browser. This makes it really easy to generate masks on the go.
Let's try it out!
Let's try it out on one of your accounts that you've indicated you'd like to keep, but you need to Balkanize it from the rest of your identity. Maybe it's your Walmart account or heck, even Instagram. Or you could choose one that's really low-hanging fruit.
Either way, go back to your accounts spreadsheet you started on Day Two and locate an account to practice on. Log in to your account with your usual email address. Now navigate to their settings, user account or preference pane. They should offer the option to change your email address...
Go right ahead! Input a mask for your email address using your service of choice. Try it out, right away, and see what happens. You should be able to generate a duck, mozmail, or simplelogin email mask with a click. In many cases, if you have the browser extension properly installed, a little icon will show up in the email dialog box: click there and it will make you a mask, voila!
Make sure you save your new login in your password manager. More on this later.
Now log in to your masking program of choice and see what your dashboard looks like. You should be able to see a list of masks in use and manage them from there. Pretty cool!
You can even do this on the go. I love with Firefox Relay that I can just make up a mask on the spot, even in a store, like "gemmasbirthdaybouncezone@myaccount.mozmail.com" and the mask is instantly available. I also love that Duckduckgo's mobile browser will let me come up with a mask on the spot as well, to input into whatever system I choose. This makes it easy, even in an in-person encounter, to give away a mask or an alias instead of my actual addresses.
Email Everywhere All At Once
You've done it! You have a sense of your different email needs from your roadmap. You have set up more than one account that can handle different levels of security. You have set up masking to offer an obfuscation service for these email accounts. Your email can be Balkanized moving forward, split into these different buckets for your different personalities, needs, activities, and threat models. Now you can pick and choose your email for the occasion. Bravo!
Now let's be sure you're set up for the next steps. You have to be able to access those email accounts from anywhere before your free trial expires.
If you're on a Mac (or an iPhone), or a Windows machine, you can use the built-in Mail app to access these accounts IMAP/SMTP instructions
Anyone can also download Thunderbird, a free and open source mail application from Mozilla, to manage your messages on Mac, PC, Android or iOS. Definitely get this program on your Android phone as it's your alternative to the Gmail app.
Make sure you have software to access on your computer as well as on your phone or other mobile device too. You will soon be rid of that big "G" app for email.
Once this software is installed, take these the last few minutes today to set up your mail applications so that they can access those new mail accounts. You can do this by searching the website of the service you signed up for to find the "IMAP" and "SMTP" instructions.
IMAP is how you check your mail from anywhere. Your email sits on their server, and with these instructions you can check it from your application at home. It won't delete the messages from the server so that means you can check from multiple devices at once. Meanwhile, SMTP is the transfer protocol for sending mail, which you need to send messages.
These settings are visible on every email system's website so follow their instructions for your operating system. Just plug in the correct addresses and port numbers, and any other instructions as well. Try sending and receiving a message from the account to be sure it works.
Note that if you have Protonmail, you'll need to download their own app for access, both on your desktop and on your phone or table. They don't allow IMAP or SMTP access to ensure everything about their email service is encrypted and kept safely in Switzerland.
That said, make sure you have something like Mac Mail or Thunderbird downloaded to your computer before we move on, and an account that also offers IMAP access. You will need this in place for moving mail around and balkanizing effectively.
And that's it!
Congratulations! You now have a totally different way to manage your email, one that keeps your addresses and accounts safe. Now you get to choose what a company knows about you. You get to keep all those different trackers and corporate databases separate as much as possible. The power is back in your hands. It feels good, doesn't it?
New browser, new email ... your opt out journey is well underway! Keep it up, here's more still to come!
(PS. You can also read or share my post about how to manage emails here).